Why a Solar Street Light Stops Working: Four Subsystems Behind Every Symptom
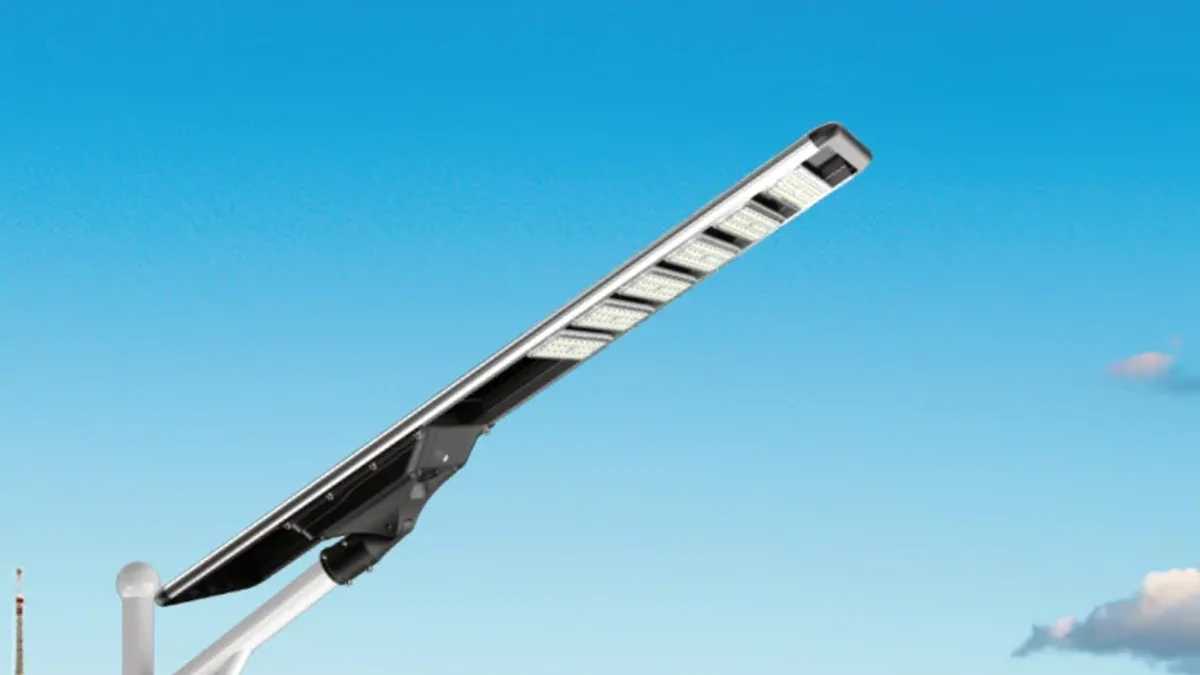
An integrated solar street light is four subsystems in one housing: the solar panel, the LiFePO4 battery, the MPPT controller with its light and motion sensors, and the LED module. Every complaint on site — dead, dim, on too early, off too soon — comes from one of those four, or from the installation. Diagnose in that order.
The order matters because the symptoms overlap. A unit that lights for two hours and then goes dark can be a battery that no longer holds charge, a panel that is shaded or soiled, a controller that has cut the load to protect the pack, or a dimming profile working exactly as programmed. Replacing parts before you know which of those is happening is how a maintenance budget disappears — the replacement fails the same way, for the same reason, a month later.
What follows is the sequence our engineers use on service visits, written for the people who buy, install and maintain solar street lighting in quantity: distributors, EPC contractors and facility teams. It applies to all-in-one fixtures and to split-type systems where the panel and battery are separate from the luminaire.
Read the Failure Pattern at Site Level Before You Open Anything
When several lights fail together, the cause is usually shared — shading, one production batch, one installation crew — rather than the individual fixture. Record which poles failed, how many, since when, and whether the failure was gradual or overnight. That record decides whether you are filing a warranty claim, correcting an installation or revisiting the design.
Then confirm the site data that is easy to take for granted: daily sun hours in the worst month of the year, shade at 9am and 3pm, mounting height, panel tilt, and anything built nearby since commissioning. A light that worked for two years and then stopped often has a new shadow rather than a failed component — a tree that grew, a new building, a billboard, or a pole that was repainted and moved the sensor's exposure.
Our published installation range is a useful reference point when you suspect a layout problem: the 100W ZHENYE model is specified for 6-7 m mounting height and 25-30 m spacing, the 150W for 7-8 m and 30-35 m, the 200W for 8-10 m and 35-40 m, and the 300W for 10-12 m and 40-45 m. If half the lights on a road were installed outside those ranges, the fault pattern will follow the layout, not the batch.
The Five-Minute Check That Needs No Tools
Before reaching for a multimeter, rule out the four most common non-faults: the unit is switched off or left in a manual mode, the panel is dirty or partly covered, an external light source is hitting the panel or sensor at night, and the dimming schedule is behaving exactly as programmed. All four look like failures after dark.
- Cover the panel after dark. If the light comes on within about a minute, the light-control sensor and the LED module are working and the real problem is charging or scheduling.
- Check the switch or the remote. Integrated models carry a switch button and remote-capable versions have operating modes. The published dimming schedule only runs in automatic mode, so a unit left in constant-on or manual mode drains its battery and then looks broken.
- Look at the panel surface. Dust, bird droppings, salt film, snow, leaves and construction residue cut charging far more than most buyers expect, and they are invisible from ground level at night.
- Look for ambient light at night. A floodlight, an illuminated shop sign or a newly installed lamp aimed at the fixture will hold the sensor in daylight mode.
- Write down three nights of runtime. On time, off time and relative brightness tell you more than any single measurement, and they become the evidence for a claim if you need one.
Symptom-to-Fault Table: What Each Behaviour Usually Means
Use this table as a first pass, then confirm the suspected part with a meter and the specification sheet for the exact model. It is written for fleet maintenance, so the "how to confirm" column is what turns a suspicion into a warranty claim or a work order you can defend later.
| Symptom on site | Most likely cause | How to confirm | Action |
|---|---|---|---|
| Dead on the first night after installation | Unit still switched off, battery at shipping state of charge, or a connector not fully seated | Cover the panel after dark, check the switch, inspect every plug connection | Switch to automatic mode, reseat connectors, allow one full sunny day of charge, retest |
| Works two to four hours, then goes dark, every night | Battery not accepting full charge, panel shaded or soiled, or storage undersized for the lighting profile | Log three nights of runtime, clean the panel, measure charging current at midday | Clean or re-site the panel first, then request a battery capacity test |
| Dim from the first hour and never reaches full output | Low state of charge, panel problem, or LED driver fault | Compare the suspect unit with a known-good unit of the same model at the same hour | Rectify charging first; if output stays low afterwards, isolate the LED module |
| Comes on during the day | Light-control sensor window covered by dirt or insect debris, or strong light reflected onto the panel | Wipe the sensor window and panel; then cover the panel and watch the behaviour | Clean the sensor window, re-aim or re-site the fixture |
| Full brightness all night with nobody present | Manual or constant-light mode selected, or the sensor is being triggered by moving foliage or animals | Check the operating mode, then watch the detection zone after dark | Return to the published dimming profile, trim vegetation, reduce sensitivity |
| Does not brighten when people walk past | Sensor blocked, misaligned or failed; or the detection zone points at a surface with no movement | Walk through the detection zone while watching the LED | Re-aim and reset sensitivity; if unchanged, report the sensor as a fault |
| Flickering or cutting in and out | Loose terminal, moisture in a connector, or thermal cut-back in high ambient temperature | Inspect glands and connectors for water; check whether the housing runs abnormally hot | Dry and reseal, replace damaged cable, verify airflow around the housing |
| One unit in a batch of fifty fails | Transport handling damage or random component failure | Compare the unit's QC code with the shipment and test records | Raise a warranty claim with photos, readings and the QC code |
| Runtime falls gradually over several years | Battery ageing — LiFePO4 packs are published at 8-10 years service life | Sample two or three units for a capacity test rather than testing all of them | Plan staged battery replacement instead of site-wide replacement |
| Lights out after a storm | Vibration-loosened connectors, water ingress, or physical damage to the panel | Inspect pole, bracket and cable route before testing anything electrically | Reseat and seal, and re-torque the pole anchor bolts as the published pole guidance requires |
Testing the Solar Panel
Disconnect the panel from the controller and measure it in full midday sun, then compare the reading with the figure published for your model — the ZHENYE 100W, for example, publishes a 6 V / 60 W panel. A reading far below the nameplate in clear sun points to a shaded, soiled or damaged panel, not to the controller.
Ask the factory for the expected open-circuit and short-circuit range for that exact model rather than assuming a number: nominal panel voltage is not what you read on an open circuit, and the acceptable window differs by design. In the field, the measurement that matters most is the gap between a suspect unit and a known-good unit of the same model, measured on the same day at the same hour. Our published panel power rises across the range — 6 V / 60 W on the 100W model, 6 V / 90 W on the 150W, 6 V / 120 W on the 200W and 6 V / 180 W on the 300W — so always compare like with like.
Then check the mechanical side: is the panel clean across its whole surface, is it still tilted toward the midday sun, has the fixture rotated on its bracket, and does the roof or wall of a new building now cut the afternoon sun? Partial shading costs more than its area suggests, because the cells are connected in series and one shaded group drags down the string. On our pole brackets the panel mounting angle is published as 15 degrees elevation; if the site was set up differently, note it before you blame the electronics.
Testing the Battery: Capacity, Not Voltage Alone
A LiFePO4 pack can show a normal voltage and still deliver almost no energy, so voltage alone is not a battery test. What matters is usable capacity under load and how runtime has changed over time. Our published pack service life is 8-10 years, and capacity declines gradually long before a unit stops working completely.
Published storage across the ZHENYE range is 3.2 V LiFePO4: 240 Wh on the 100W model, 360 Wh on the 150W, 480 Wh on the 200W and 720 Wh on the 300W. Those figures are the reference point for any capacity discussion. A pack that has been left fully discharged for months may be unrecoverable, which is the practical reason a unit taken out of service should be charged before storage and checked before it is re-installed. Cold weather also reduces usable capacity temporarily; that is chemistry, not a defect, so a winter complaint should be verified with a capacity test rather than a replacement order.
Service access is the part most buyers overlook. Our published product guidance is that the battery compartment should not be disassembled without professional guidance, and on an integrated fixture the pack shares its housing with the controller and the LED module. Battery service is therefore a factory-supported operation, not a field swap. If you are buying a fleet, ask two questions before you order: which parts are field-replaceable on this model, and what does the factory supply as a service kit.
Controller, Light Sensor and Motion Sensor Faults
The controller is the component technicians replace most often, and it is usually innocent. Our models publish an MPPT controller combining light control, timer control and human presence detection, and most reported "controller failures" turn out to be mode settings, blocked sensors or a wet connector. Confirm those three before condemning the board.
Work through it in this order. First, confirm the operating mode against the published dimming profile — a unit set to constant output will behave unlike its neighbours all night. Second, clean the light sensor window and the motion sensor lens: dust, salt film, spider webs and insect nests are common causes of a light that stays on in daylight or never reacts. Third, inspect the plug connections and the cable route; a connector holding water can reset or disable the controller intermittently, which is why flickering and random shutdowns are so often a moisture story rather than an electronics story.
If a controller genuinely has to be replaced, order the matching part for that model and confirm how its parameters are written before installation — dimming schedule, sensor sensitivity and low-voltage protection. A replacement board installed with default settings will make one pole in a street behave differently from every other pole, and that is a fault you create yourself.
Symptoms That Are Not Faults: The Published Dimming Profile
A light that dims after midnight is usually working exactly as designed. Our published default profile runs at 100% output with people present and 50% without during hours 1-4, at 70% and 40% during hours 5-8, and at 60% and 30% during hours 9-12, which is how an all-in-one fixture survives a cloudy week.
The distinction to teach your maintenance team is between a step change and a failure. A smooth reduction to a lower, steady level at a scheduled hour is the profile. A hard cut to black, flicker, or a light that never reaches full output at dusk is a fault. The same logic applies to the motion sensor: it responds to movement, so a person standing still under the light is not a test, and moving foliage or passing animals can trigger a detection that looks like a malfunction.
Seasonality is the other regular false alarm. Panels produce less in a rainy season, in winter and at high latitudes, and a fixture that runs until 3am in summer may legitimately reach its reserve earlier in December. Before treating that as a failure, compare the site's worst-month sun hours with the assumptions used when the model was selected. If the storage was sized on an optimistic sun-hour figure, the fix is a design change — a larger pack, a lower-power fixture or a re-aimed panel — not a warranty claim.
Water Ingress, Wiring and Structural Faults
Water is the leading cause of permanent damage, and it rarely enters through the housing itself. It enters through cable glands, plug connectors and any cover that was re-fitted without its gasket. Inspect those three points before blaming the electronics inside, because a dry board in a wet enclosure will fail within weeks.
The fixtures themselves are built for weather: our published specification describes the ZHENYE housings as IP65 rated for year-round outdoor use, able to withstand coastal salt spray, desert heat, high-altitude low pressure and freezing snow, and every unit passes individual waterproof testing, 72-hour accelerated ageing and photometric verification before shipment. That is the baseline you paid for — so when water reaches the inside of a sealed fixture, look at the installation: glands that were never tightened, a cable left without a drip loop, insulation nicked during installation, rodent or strimmer damage, or a battery cover opened on site and closed without its seal.
Structural faults follow the same logic. The published pole specification is Q235 tapered steel with hot-dip galvanising to ISO 1461, flange baseplates from 280×280×14 mm to 400×400×16 mm, M22-M27 anchor bolts, and a Level 15 typhoon wind rating of 50.9 m/s with wind resistance calculation reports available on request. Published installation guidance is to re-torque the anchor bolts after the first major storm — a step that is routinely skipped and is the reason so many "electrical" faults after a storm are actually vibration faults. Check for a rotated fixture, a chafed cable where it passes the bracket, and coating damage that needs zinc-rich touch-up before rust starts.
Repair or Replace? Deciding at Fleet Level
Repair is the cheaper answer for a single accessible unit inside its warranty or service window. Replacement is the cheaper answer when water has reached sealed electronics, when a batch fails together, or when two site visits cost more than the fixture. Decide on cost per restored unit, not on the symptom in front of you.
Because the panel, battery, controller and LED share one housing in an all-in-one design, not every subsystem is serviceable on the pole. Before committing to a fleet, confirm three things in writing: which parts are field-replaceable on that model, what the factory ships as a service kit, and the lead time for spares and replacement units. Our published commercial terms support small-batch and mixed-model trial orders, with samples typically ready in 7-10 working days and standard production taking 15-25 days depending on volume.
For large projects, budget for spare units in the original order. Replacement shipping and clearing costs more than the fixture in most markets, and a 2-3% buffer lets you restore a failed pole immediately instead of waiting for a single-unit shipment. Keep the QC code of every unit you install against its pole number: it is the difference between a claim that is settled in days and a claim that stalls for a month.
A Preventative Maintenance Schedule That Fits a Budget
The cheapest maintenance programme is the one that finds faults before your client does. This schedule is sized for the realities of a project with hundreds of poles: it samples rather than inspects everything, and it concentrates effort on the two seasons that stress solar lighting most — the rainy season and midwinter.
| Interval | Task | Why it pays off |
|---|---|---|
| First month after commissioning | Weekly runtime log on a sample of about 10% of units; check switch states and connector seating | Catches transport and installation faults while they are still the supplier's responsibility |
| Monthly | Visual walk: panel cleanliness, housing condition, obvious impact damage, light output at dusk | The cheapest intervention there is; dirt and damage are found while they are still trivial |
| Quarterly | Clean panels and sensor windows; check panel tilt, bracket clamp bolts and gland tightness | Restores charging yield and removes the loose hardware that starts most electrical faults |
| Twice a year, before the rainy or winter season | Battery capacity test on a sample; verify dimming profile and mode settings against the published schedule | Confirms storage health before the season that will stress it hardest |
| Annually | Torque anchor bolts, inspect pole coating and fasteners, check cable glands and drip loops | Published pole guidance calls for re-torquing after the first major storm; galvanising needs touch-up after any field welding |
| After every storm or extreme weather event | Walk the line: rotated fixtures, hanging cables, water in connectors, damaged panels | Structural damage found in week one is a repair; found in year two it is a replacement |
Warranty Claims: The Evidence a Factory Needs From You
A warranty claim moves at the speed of its evidence. A photograph of a dark light is not a claim; a QC code, installation date, mounting height, meter readings and the failure pattern across the batch is. Send that pack once and the factory can usually decide without a site visit or a return shipment.
Our published warranty runs for five years from purchase and covers manufacturing defects in materials and workmanship, with a 25-year power output warranty on the solar panel. Normal wear and tear, improper installation and unauthorised modification are excluded — which is precisely why the installation record and the photograph set matter so much. Each unit carries a QC code linked to its production batch, operator team and test data, so quote it in the first message and photograph the label before the unit is removed from the pole.
Do not open the battery compartment to investigate. Our published product guidance is that it should not be disassembled without professional guidance, and on an integrated fixture it holds the pack, the controller and the LED module in one sealed assembly. Probe the cable-side connections, record your readings, and let the factory authorise the next step; unauthorised opening can compromise both the seal and the claim.
Documentation to Demand Before You Buy
Most field failures are decided at the purchase order, not on the pole. The specification sheet, photometric report, waterproof test method, wind calculation and battery transport documents tell you what the product is, how it was verified, and what you can prove to your own client two years later.
- Specification sheet for the exact model — panel power, battery capacity and chemistry, controller type, LED output, colour temperature, warranty terms and installation height in writing.
- Photometric test data — our fixtures are measured on an integrating sphere to IES LM-79, which is the document your lighting designer will ask for.
- Wind resistance calculation — our reports are verified to GB 50009 structural loading standards, up to Level 15 typhoon at 50.9 m/s, and should be requested for the pole and the fixture load together.
- Waterproof and ageing records — full-unit IP65 pressurised water spray testing and 72-hour burn-in cycling carried out before shipment, not a generic certificate pack.
- Battery documents — UN38.3 test summary and MSDS, which carriers and customs will ask for before they accept a lithium battery shipment, plus the cell safety standard applied.
- Quality system and compliance documents — ISO 9001:2015 for the factory, and CE and RoHS for the European market.
Be precise about what each document is, because buyers who are not get caught out in tenders. ISO 9001:2015 certifies the factory's quality management system, not the product. CE is a manufacturer's declaration of conformity for the EU and EEA, and it does not by itself open any other market; RoHS sits inside the same European compliance set. Market-specific approvals, radio type approval for any camera or telemetry module, and local registration requirements vary by country. We will tell you which of our documents apply to your market and project, and we do not claim approvals we do not hold.
Frequently Asked Questions
Why does my solar street light work for a few hours and then go dark?
It is almost always an energy problem rather than an electronic failure. The battery is no longer holding full capacity, the panel is shaded or dirty, or the storage is undersized for the lighting profile in that season. Log three nights of runtime, clean the panel, then ask for a battery capacity test before replacing any part.
Why is my solar street light dim instead of completely off?
Dimming is normally the published schedule working: our default profile steps output down to 50% with no one present, then lower again after hour 8. If the light is dim at dusk, flickers, or never reaches full output, that is a fault; if it steps down smoothly at a scheduled hour, it is design.
How long should a solar street light battery last?
Our LiFePO4 packs publish an 8-10 year service life, the solar panel 25 years, and the LED module 50,000 hours. Usable runtime declines gradually before a pack finally fails, so schedule a capacity test on a sample each year rather than waiting for a dark pole.
The motion sensor does not react when someone stands under the light. Is it broken?
Motion sensors detect movement, not presence: a person standing still may not trigger one, while moving vegetation or animals can. Check the detection zone and sensitivity first, and compare the unit with a second one of the same model before reporting a sensor fault.
Can I replace the battery myself?
On our integrated models the battery shares a housing with the controller and the LED module, and the published product guidance is that the battery compartment should not be disassembled without professional guidance. Ask the factory for the serviceable-parts list and the battery service procedure for your model.
What is the lead time for replacement units and spare parts?
Samples are typically ready in 7-10 working days, and standard production takes 15-25 days depending on volume and model mix; small-batch trial orders are supported. Ask for the current schedule with your enquiry, and order the spare units you will need together with the original shipment.
Next Step
If you are maintaining a fleet and want a second opinion on a failure pattern, send us the model, quantity, installation date and the readings you have collected, and our engineers will tell you which subsystem the symptoms point to and what to test next. Start from the solar street light range to confirm the published figures for each model — the 200W integrated model at 12,000LM with a 480WH pack and the 300W integrated model at 18,000LM with 720WH are the two most common choices for main roads and highways. If your failures involve storage behaviour, read the LiFePO4 battery guide; if they involve mounting, anchoring or storm damage, the solar light pole guide and the pole range list the baseplate, anchor and wind data to hand to your contractor. To match height and spacing to a road class before you order, see the solar street light selection guide. When you are ready, contact the factory with your site data and quantities.